Why You’ll Love This Recipe
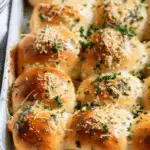
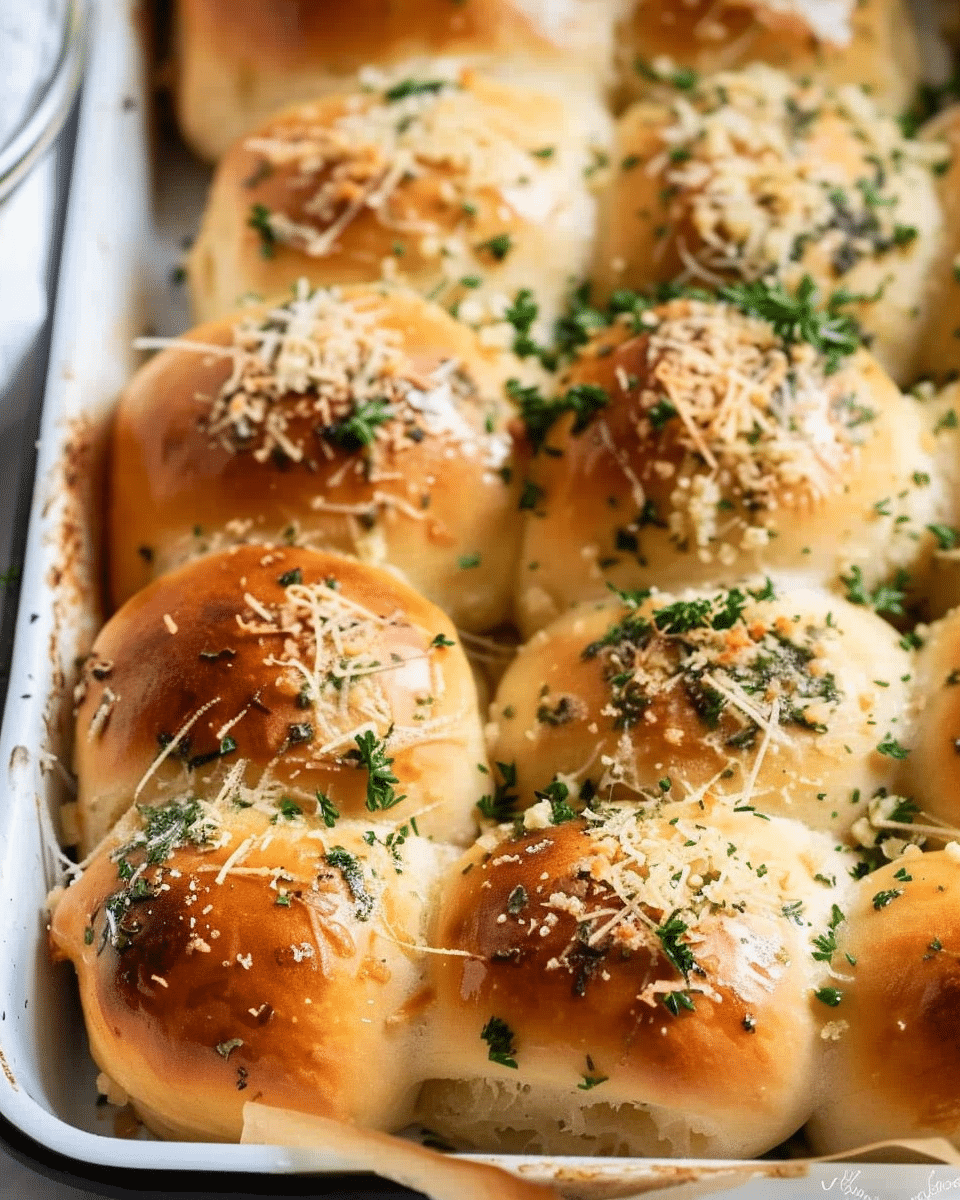
Who doesn’t love garlic bread? These garlic bread rolls take that classic flavor and turn it into a soft, pillowy roll that’s even more irresistible. The dough itself is rich and buttery, enhanced by the perfect amount of garlic and parsley. Then, they’re brushed with an extra layer of garlicky butter right out of the oven, ensuring that every bite is full of savory goodness. These rolls are easy to make and can be enjoyed warm with any meal or served as a comforting appetizer. The best part? They’re even better the next day, making them perfect for leftovers or meal prep!
Ingredients
For the Rolls
- 4 1/2 tablespoons unsalted butter
- 2 tablespoons minced garlic
- 3 1/2 cups + 1 tablespoon all-purpose flour (See notes below for measuring)
- 3 tablespoons chopped fresh parsley
- 1 tablespoon granulated sugar
- 2 1/4 teaspoons instant yeast
- 1 teaspoon fine sea salt
- 1 cup whole or 2% milk, warmed to 110°F
- 1 large egg, room temperature
- 1 beaten egg (for brushing the tops)
For the Garlic Butter
- 2 tablespoons unsalted butter
- 1 tablespoon minced garlic
- 1 tablespoon chopped fresh parsley
- Flaky sea salt, for finishing
(Tip: You’ll find the full list of ingredients and measurements in the recipe card below.)
Directions
- Prepare the Dough: In a small saucepan, melt 4 1/2 tablespoons butter over medium heat. Add the minced garlic and cook for 1-2 minutes, just until fragrant. Remove from heat and let it cool slightly.
- Activate the Yeast: In a large mixing bowl, combine the warm milk and sugar. Sprinkle the instant yeast over the top and let it sit for 5-10 minutes until it becomes foamy.
- Make the Dough: Add the melted garlic butter, egg, parsley, and salt to the yeast mixture. Stir to combine. Gradually add the flour, one cup at a time, until the dough begins to come together. You may need a little more or less flour depending on the humidity, so adjust as needed. The dough should be soft and slightly sticky.
- Knead the Dough: Turn the dough out onto a lightly floured surface and knead for about 8-10 minutes, or until the dough is smooth and elastic. You can also do this in a stand mixer with the dough hook attachment.
- First Rise: Grease a large bowl with a little oil or butter. Place the dough in the bowl, turning it once to coat it in oil. Cover with a damp cloth or plastic wrap and let it rise for 1-2 hours, or until it has doubled in size.
- Shape the Rolls: Once the dough has risen, punch it down and divide it into 12 equal portions. Roll each portion into a smooth ball and place them in a greased 9×13-inch baking dish or round cake pan, spacing them evenly.
- Second Rise: Cover the shaped rolls with a clean cloth or plastic wrap and let them rise for another 30-45 minutes, or until they have puffed up and nearly doubled in size.
- Preheat the Oven: Preheat the oven to 375°F (190°C) while the rolls are rising.
- Bake the Rolls: Brush the tops of the rolls with the beaten egg. Bake for 18-20 minutes, or until the rolls are golden brown and sound hollow when tapped on the bottom.
- Prepare the Garlic Butter: While the rolls are baking, make the garlic butter. In a small saucepan, melt the remaining 2 tablespoons of butter over medium heat. Add the minced garlic and cook for 1-2 minutes, then remove from heat. Stir in the chopped parsley.
- Finish the Rolls: Once the rolls are done baking, remove them from the oven and immediately brush them with the prepared garlic butter. Sprinkle with flaky sea salt for an extra touch of flavor.
- Serve: Let the rolls cool slightly before serving, or enjoy them warm from the oven.
Servings and Timing
- Servings: 12 rolls
- Total Time: 3 hours (including rise times)
Variations
- Cheese Garlic Rolls: For an extra cheesy twist, fold in 1/2 cup of shredded mozzarella or Parmesan cheese into the dough during the mixing step.
- Herb-Infused Rolls: Add a mix of herbs like rosemary or thyme for a fragrant, herby flavor that complements the garlic.
- Gluten-Free Option: Use a gluten-free flour blend to make these rolls gluten-free. Ensure your yeast is gluten-free as well.
Storage/Reheating
- Storage: Store leftover garlic bread rolls in an airtight container at room temperature for up to 2-3 days. For longer storage, wrap them in plastic wrap and freeze for up to 2 months.
- Reheating: To reheat, wrap the rolls in foil and warm them in a 350°F (175°C) oven for 10-15 minutes. Alternatively, reheat individual rolls in the microwave for 20-30 seconds.
FAQs
Can I make the dough ahead of time?
Yes, you can prepare the dough the day before and let it rise in the fridge overnight. Simply let it come to room temperature before shaping and proceeding with the second rise.
Can I use garlic powder instead of fresh garlic?
While fresh garlic provides the best flavor, you can substitute garlic powder if needed. Use about 1 teaspoon of garlic powder for every tablespoon of fresh garlic.
Can I freeze the rolls before baking?
Yes, you can freeze the shaped rolls before the second rise. Place them on a baking sheet in the freezer, and once frozen, transfer them to a freezer bag. To bake, simply thaw them in the fridge overnight and let them rise before baking.
Can I use salted butter instead of unsalted?
You can use salted butter, but be sure to reduce the added salt in the recipe to compensate for the extra salt in the butter. About 1/2 teaspoon less salt should be sufficient.
Why do I need to brush the rolls with egg wash?
The egg wash helps the rolls achieve a beautiful golden brown color and a shiny finish on the top. It also helps the garlic butter stick better once they come out of the oven.
Can I make these rolls without parsley?
Yes, you can skip the parsley if you prefer a simpler garlic roll. You can also substitute other fresh herbs like thyme or basil for added flavor.
Can I make these rolls in advance?
Yes, you can make the rolls ahead of time and store them in an airtight container. If you make them a day in advance, they will still be soft and delicious the next day!
How can I prevent the rolls from drying out?
Store the rolls in an airtight container or wrap them in a clean kitchen towel to keep them soft and fresh. Reheat them before serving for the best texture.
Can I bake these rolls in a different pan?
Yes, you can bake the rolls in any pan, but a 9×13-inch baking dish works best for an even rise. If you prefer, you can also bake them in muffin tins for individual rolls.
How do I make sure the rolls rise properly?
Ensure the yeast is active by letting it bloom in warm water before using it. Keep the dough in a warm place for both rises, and be patient for it to double in size.
Conclusion
These Garlic Bread Rolls are the ultimate comfort food, offering a warm, buttery, and garlicky treat that’s perfect for any meal. Whether you’re serving them as a side dish or enjoying them on their own, these rolls are sure to please every palate. Soft, fluffy, and full of flavor, they’re easy to make and perfect for any occasion. Give this recipe a try and enjoy the magic of homemade garlic bread rolls fresh from the oven!
PrintGarlic Bread Rolls
These homemade Garlic Bread Rolls are irresistibly soft, buttery, and bursting with garlicky flavor. Perfect for pairing with pasta, as a side dish, or as a snack, these fluffy rolls will become your go-to for any occasion. Easy to make and loaded with fresh garlic, they’re a true crowd-pleaser.
- Prep Time: 45 minutes
- Cook Time: 20 minutes
- Total Time: 3 hours (including rise time)
- Yield: 12 rolls
- Category: Side Dish, Snack
- Method: Baking
- Cuisine: American
- Diet: Vegetarian
Ingredients
For the Rolls:
4 1/2 tablespoons unsalted butter
2 tablespoons minced garlic
3 1/2 cups + 1 tablespoon all-purpose flour
3 tablespoons chopped fresh parsley
1 tablespoon granulated sugar
2 1/4 teaspoons instant yeast
1 teaspoon fine sea salt
1 cup whole or 2% milk, warmed to 110°F
1 large egg, room temperature
1 beaten egg (for brushing the tops)
For the Garlic Butter:
2 tablespoons unsalted butter
1 tablespoon minced garlic
1 tablespoon chopped fresh parsley
Flaky sea salt, for finishing
Instructions
-
Prepare the Dough: Melt 4 1/2 tablespoons butter in a saucepan over medium heat. Add minced garlic and cook until fragrant, about 1-2 minutes. Remove from heat and set aside.
-
Activate Yeast: In a mixing bowl, combine warm milk and sugar. Sprinkle yeast over the mixture and let sit for 5-10 minutes until foamy.
-
Make Dough: Add garlic butter, egg, parsley, and salt to the yeast mixture. Gradually add flour until the dough is soft and slightly sticky.
-
Knead the Dough: Turn out dough onto a floured surface and knead for 8-10 minutes, or use a stand mixer with a dough hook.
-
First Rise: Grease a bowl, place dough inside, and cover. Let rise for 1-2 hours until doubled in size.
-
Shape the Rolls: Punch down dough and divide it into 12 portions. Roll into balls and place in a greased 9×13-inch pan.
-
Second Rise: Let rolls rise for 30-45 minutes until puffy.
-
Bake: Preheat oven to 375°F. Brush rolls with beaten egg and bake for 18-20 minutes until golden and hollow-sounding.
-
Prepare Garlic Butter: While rolls bake, melt remaining butter in a saucepan. Add garlic and cook until fragrant, then stir in parsley.
-
Finish Rolls: Brush baked rolls with garlic butter and sprinkle with flaky sea salt.
-
Serve: Let cool slightly before serving or enjoy warm.
Notes
For extra cheesy rolls, fold in 1/2 cup of shredded cheese into the dough.
You can make these gluten-free using a gluten-free flour blend.
The dough can be made ahead of time and stored in the fridge overnight for a quicker baking process the next day.

